Connecting components in an assembly FEM with 1D connections
In this tutorial, you will learn how to connect component FEM files using a 1D connection.

Assembly FEMs may contain many component FEMs, and can take up large amounts of space on your system. By default, in Pre/Post, the parts and idealized parts associated with the component FEMs are not loaded automatically. You must explicitly choose to load these parts.
In this activity, you must load all the parts associated with the component FEMs. This allows the solver to access midsurface thickness data, which is stored in the idealized part.
First, you will change a customer default setting to allow parts associated with component FEMs to be automatically loaded.
Start Simcenter 3D or NX.
|
File |
Utilities→Customer Defaults
-
Simulation
Pre/Post
General
Environment
-
 Automatically Load Associated Parts for Component FEM
 -
OK
Customer Defaults dialog box
-
OK
message
|
File |
-
 Exit
Exit
You must restart the software to make changes to the customer defaults take effect.
-
On your desktop or the appropriate network drive, create a folder named satellite.
-
Click the link below:
-
Extract the file to your satellite folder.
-
Open Hessi Satellite AFM.afm.

-
Open Solar Panels_assyfem1.afm.

The options you select in dialog boxes are preserved for the next time you open the same dialog box within a given session. Restore the default settings to ensure that the dialog boxes are in the expected initial state for each step of the activity.
|
File |
Preferences→User Interface
-
Options
-
 Reset Dialog Memory
 -
OK
Reset the customer default that you set at the beginning of the activity.
|
File |
Utilities→Customer Defaults
-
Simulation
-
Pre/Post
-
General
-
Environment
-
 Automatically Load Associated Parts for Component FEM
 -
OK
-
OK
message
![]() Simulation Navigator
Simulation Navigator
-
 Solar Panel Inner_fem1.fem
 -
 Make Work Part
-
Solar Panel Inner_fem1.fem
-
Edit
-
Edit Bodies to Use
-
Bodies to Use
All Visible

-
OK
-
Only the sheet body is visible for the idealized part. When you edit the FEM to use only visible bodies, you remove the solid polygon body from the FEM.
The component FEM now contains only the polygon sheet body representing the midsurface.
-
Make Solar Panel Outer_fem1.fem the work part.
-
Edit Solar_Panel Outer_fem1.fem.
-
Configure the FEM to edit all visible bodies.
Refer back to the previous step for details.
The component FEM now contains only the polygon sheet body representing the midsurface.
![]() Simulation Navigator
Simulation Navigator
-
Solar Panels_assyfem1.afm
-
Make Work Part
Both component FEMs are visible and selectable.
 1D Connection (Home tab→Connections group)
-
Type
Node to Node
-
Connection Element
-
Type
RBE2
-


-

-

-
OK

![]() Simulation Navigator
Simulation Navigator
-
Solar Panels_assyfem1.afm Assembly Checks→Assembly Label Manager
-
 Automatically Resolve
-
OK
 Save
Save
![]() Simulation Navigator
Simulation Navigator
-
Simulation File View
-
Hessi Satellite AFM
-
Make Displayed Part
![]() Simulation Navigator
Simulation Navigator
-
HESSI_Satellite.prt Load
-
 HESSI_Satellite.prt
The status of the four instances of Solar Panels.prt is Ignored.
![]() Simulation Navigator
Simulation Navigator
-
HESSI_Satellite.prt
-
Solar Panels.prt (any of the four Solar Panels nodes)
-
Find All Matching Components
-
the selection and choose Map Existing
-
FE Model
Solar Panels_assyfem1
-
OK
Map CAD Component To Existing FEM dialog box

1D Connection (Connections group)
-
Type
Node to Node
-
Connection Element
-
Type
RBE2
-
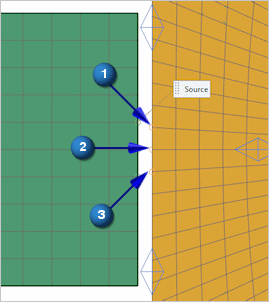
(nodes on the edge of the solar panel)

-
-
(nodes on the edge of the deck)
-
Apply

-
Connect the remaining three panels to the deck.

-
Cancel
when finished
![]() Simulation Navigator
Simulation Navigator
-
Hessi Satellite AFM.afm Assembly Checks→Assembly Label Manager
-
Automatically Resolve
-
OK
Save
|
File |
-
Close→All Parts
-
Exit
Exiting the application ensures that the changes that you made previously to the customer defaults take effect.