Create a new work package
In Teamcenter, a work package is a collaboration context (CC) object, which is a container for product, plant, and process structures. When you create a new work package, you must locate a product structure created in Teamcenter by a design, manufacturing, or other engineer. Optionally, you can similarly locate a plant or process structure for use in your work package, or create a new process structure of your own.
From your home page, click New Work Package.
Type a Name for your work package, and optionally, a Description, and then click Create.
The name of your work package is displayed in a view that requires you to define product, plant, and process structures.
In the Product panel, click Add Product.
In the Add Product to Work Package dialog box, type the partial or full name of the product you want to open and click .
Tip:You can also use asterisks * as wild cards as in any standard search program (for example *vehicle to locate products named truckvehicle, carvehicle, and so on). Use a single asterisk to locate all products in your database.
In the search results, click the appropriate product.
Tip:If the product name is cut off, hover over its name to see the full text.
Accept the default revision rule or from the list, select a different rule.
Revision rules let you see the product's as-maintained structure (usually Latest Working). If your administrator has added other rules, you might instead see the product at a specified date, or see only physical parts that are operational or nonoperational, and so on.
Click Add Product.
The selected product loads in the Product panel, with the revision rule displayed at the bottom.
In the Process panel, add an existing process or create your own.
To add an existing process, follow steps 3-7 above to locate an appropriate process rather than a product.
To create a new process:
Click Create Process.
In the Create Process dialog box, select an appropriate process type.
Beneath your selected process type, type a Name, and optionally, a Description, and click Create.
(Optional) To add an existing plant, follow steps 3-7 above to locate an appropriate plant element (for example, a zone, station, or line), rather than a product.
In the upper-right corner of the work package screen, click .
The screen opens, in planning mode by default, with the selected or new process name displayed at the top and the work package displayed to the right.
Use the following steps to navigate a process:
Scroll through and expand the product list.
Click
 to expand the product structure.
Select a product from the list.
In the Process table, select a process, and click the Work Instructions tab.
To navigate the Product tab, scroll through the list of products and click
to move to parts contained in any parts you want to examine.As you move into the product hierarchy, use the following buttons to navigate and verify your location in the tree.
Button
Description

Back one level

Forward one level

Go to top level

View current level in the hierarchy, or jump to another level
Example: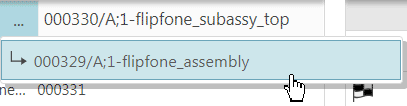
This behavior works the same for the Resources tab.