Creating animation cameras
In this tutorial, you will create three animation cameras to capture the movement of a mechanism from three perspectives: the driver of the car, the person at the center of the track, and a point in space along the outside of the car. You will then add the animation cameras to three animation nodes and play all of them simultaneously.

-
On your desktop or the appropriate network drive, create a folder named animation_camera.
-
Click the link below.
-
Extract the files to your animation_camera folder.
-
Start Simcenter 3D or NX.
Before starting the tutorial, you must download the part.
|
File |
 Open
Open
-
Navigate to the animation_camera folder you created.
-
File name
race_car.sim
-
OK
The options you select in dialog boxes are preserved for the next time you open the same dialog box within a given session. Restore the default settings to ensure that the dialog boxes are in the expected initial state for each step of the activity.
|
File |
Preferences→User Interface
-
Options
-
 Reset Dialog Memory
 -
OK
The mechanism has already been solved and includes a default animation.
|
Results |
-
 Play (Animation group)
-
-
 Finish (Animation group)
The first animation camera captures the movement of the car from the driver's perspective. The camera is associated with the geometry of the driver, and the target is a point in space in front of the car. Associating the camera with the model geometry ensures that if the model changes, the initial position of the camera changes as well. The camera and target both move with the car. The preview window displays the effects of your selections.
![]() Motion Navigator
Motion Navigator
-
 race_car
 -
 New Animation Camera
 -
Projection Mode
Perspective
-
Camera Name
Driver
-
Target Initial Position
-
 Point Dialog (Specify Orientation)
-
X
-490
-
Y
-350
-
Z
10
-
OK
Point dialog box
The origin of the target coordinate system is beyond the first pillar, so the pillars appear in the animation.
-
Target Movement
-
 Select Motion Body
 -


Using the same motion body for the target and the camera ensures that both move together.
-
Camera Initial Position
-
 Associate to Geometry
 -
 Arc/Ellipse/Sphere Center (Specify Point)
-

-
 ZC-Axis (Specify Up Vector)
This indicates the top direction of the camera.
-
Camera Movement
-
Select Motion Body

-
Lens
-
Zoom to
35mm

-
OK
A new camera named Driver appears under Animation Cameras in the Motion Navigator.
The second animation camera tracks the movement of the car from the middle of the track. Although the camera does not move, associating it with the geometry of the person at the center of the track makes it easier to define the initial position and orientation.
![]() Motion Navigator
Motion Navigator
-
Animation Cameras
-
New
-
Projection Mode
Perspective
-
Camera Name
Tracking
-
Target Initial Position
-
Associate to Geometry
-
 Arc/Ellipse/Sphere Center (Specify Point)
-
-
Target Movement
-
Select Motion Body
-

-
Camera Initial Position
-
Associate to Geometry
-
Arc/Ellipse/Sphere Center (Specify Point)
-

Be sure to use the person at the center of the track rather than the driver.
-
ZC-Axis (Specify Up Vector)
-
Lens
-
Zoom to
35mm
-
OK
A new camera named Tracking appears under Animation Cameras in the Motion Navigator.
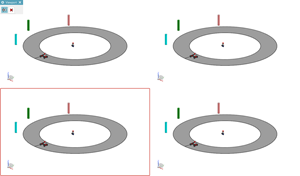
The third animation camera, located outside of the track, travels alongside the car as it moves around the track. Neither the target nor the camera are associated with any geometry, so changes to the model will not affect their initial location.
![]() Motion Navigator
Motion Navigator
-
Animation Cameras
-
New
-
Projection Mode
Perspective
-
Camera Name
Alongside
-
Target Initial Position
-
Point Dialog (Specify Orientation)
-
X
47
-
Y
-370
-
Z
20
-
OK
Point dialog box
-
Target Movement
-
Select Motion Body
-

-
Camera Initial Position
-
Point Dialog (Specify Orientation)
-
X
50
-
Y
-915
-
Z
0
-
OK
Point dialog box
-
Camera Movement
-
Select Motion Body
-

-
Lens
-
Zoom to
35mm
-
ZC-axis rotation handle of the animation camera coordinate system

-
Angle
10

-
Enter
-
OK
A new camera named Alongside appears under Animation Cameras in the Motion Navigator.
To view an animation camera's perspective, you must add that camera to an animation node in an active solved solution. You do not have to solve the solution again. Each animation node can have only one animation camera, so to view the perspectives of multiple animation cameras simultaneously, you must create multiple animations.
![]() Motion Navigator
Motion Navigator
-
 Solution_1→Results→Animation
-
Default Animation
-
 Clone
CloneAn animation named A_1 appears under the Animation node.
Clone the default animation two more times to create animations A_2 and A_3.
-
Animation Cameras
-
Driver
-
Add to Active Solution→A_1.
The Driver animation camera appears under Solution_1→Results→Animation→A_1.
Repeat this process to add the Tracking animation camera to A_2 and the Alongside animation camera to A_3.
To see all the animation camera perspectives simultaneously, you will display four viewports and associate an animation with each one.
|
Results |
 Four Views (Layout group)
![]() Motion Navigator
Motion Navigator
-
Solution_1→Results→Animation
-
 A_1
Note:
A_1
Note:The check box does not become selected until after you select a viewport.
-
 Select Viewport by Cursor (Viewport window)
-
the lower-left viewport
Repeat this process to assign animation A_2 to the upper-right viewport and animation A_3 to the lower-right viewport.
|
Results |
-
Play (Animation group)
-
-
Finish (Animation group)
Tip:
To see an animation camera icon (
 ) when you play an animation, choose File→Preferences→Motion and select the Display Animation Camera Icon in Animation check box. This can be helpful in troubleshooting the initial location, orientation,
and movement of the camera.
) when you play an animation, choose File→Preferences→Motion and select the Display Animation Camera Icon in Animation check box. This can be helpful in troubleshooting the initial location, orientation,
and movement of the camera.
|
File |
-
Close→All Parts