Locate a study using the Study Manager
In NX, fixture planners use the Study Manager tab of the resource bar to search for and load studies in a particular collaboration context object. When using this dialog box, it is not necessary to search for structures in the Teamcenter rich client and send them to NX.
If you want to be able to use a study in the NX Study Manager tab of the resource bar, you must create the study in the Teamcenter, NX, or Process Simulate Study Manager dialog box. Any studies created using the legacy New Study ![]() command must be converted before they can use used.
command must be converted before they can use used.
For detailed information on collaboration contexts, see the Tecnomatix Collaboration Context Reference Manual.
View studies using the NX Study Manager
From the NX Fixture Planner resource bar, choose the Study Manager tab.
The Study Manager view appears, listing the most recent collaboration contexts you opened in the Recent Collaboration Contexts list.
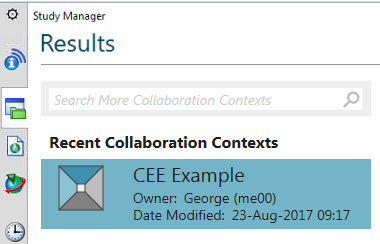
(Optional) In the Search More Collaboration Context box, type a search string to search for a collaboration context.
Select a collaboration context object in the list in the left pane.
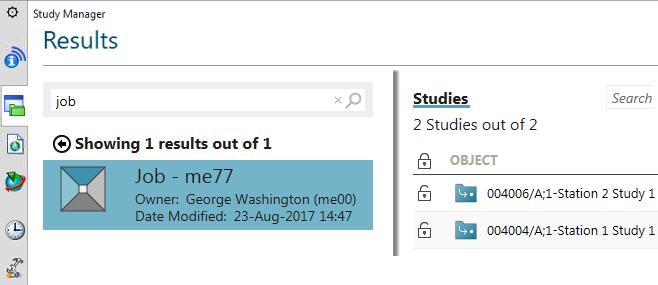
All studies associated to the collaboration context are displayed in the right pane.
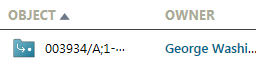
The study properties are displayed in columns, for example, Name, Owner, Description. The object type is also shown.
Shared study
In the Study Manager, a shared study uses this icon . Changing the process in the study affects the original process in the process structure.
Isolated study
In the Study Manager, an isolated study uses this icon . Changing the process in the study does not affect the original process in the process structure.
Select a study in the right pane.
(Optional) View the study properties
View studies using the NX Study Manager.
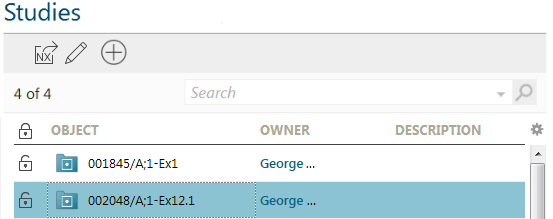
The studies are displayed in a table. Each column is a property of a study revision object. You can configure the columns that are displayed in this table. The columns are stored in the TCMA_StudyMgrStudyGrid_Column user preference.
On the Study Manager tab of the resource bar, click Table Columns
 and choose Select Columns.
The Columns Selector dialog box is shown.
By default, 17 properties of a study revision are shown in the Available Fields list.
You can enter part of the name of the column you wish to display in the Filter to find it easily.
The contents of the Available Fields list can be configured by your administrator. See the Teamcenter Manufacturing Access Deployment documentation for details.
(Optional) Select the properties to add from the list on the left and click Add .
For example you could add Release Status and Is Approved.
(Optional) Select the properties to add from the list on the right and click Remove .
(Optional) Drag the properties on the right to change the order of the columns.
Click OK.
The new properties are displayed in the table
(Optional) Sort and organize table columns
View studies using the NX Study Manager.
(Optional) To reorder the columns: On the Study Manager tab of the resource bar, drag a column header and place it in between two others.
For example, drag the Description column to the left of the Object column.
(Optional) To sort the studies by a property: On the Study Manager tab of the resource bar, click a column header.
For example, sort by the Object column.
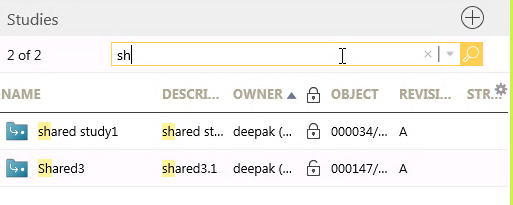
(Optional) Filter the list of studies by name
View studies using the NX Study Manager.
On the Study Manager tab of the resource bar, type part or all of a study name in the Search box.
For example, type sh.
Note:You cannot use wildcards (*) in your search (for example, Isolate*).
Press Enter or click Search .
A subset of studies are shown.
All studies with names that begin with sh are displayed and all other studies are hidden. The search string is highlighted in yellow in the study name and description.
(Optional) Filter the list of studies using a study property
View studies using the NX Study Manager.
On the Study Manager tab of the resource bar, click the down arrow
 to the right of the Search box, choose an object property.
For example, you could select Owner.
Enter a value, and press Enter.
For example for Owner, type either the user's name or ID in the parenthesis.


You can add additional properties to the search string, for example, Name(me00), Description(Big). You can also type the search string manually.
Note:Your administrator can add custom fields to this list using Business Modeler IDE and then adding them to the required preference described in the Easy Plan Deployment documentation.